Hey! So, I am back again. This time with a blog about…me, I guess. or rather, where I work on campus. I have been spending all four years of my education here at UPS working as a work-study student for the Slater Museum of Natural History (I actually shuffle those four words around quite a bit). What do I do there, you ask?
Well, I’ve ended up doing a lot of things. Any sort of monkey leg-work or tedious two hour tasks that need to be done, such as tying data tags to bird specimens. But, I don’t know how interesting that is, (mostly because I have already lost interest in talking about it). This all aside, what do I do most of the time? I skin birds! Or, I could say, I work on specimen preservation (but that’s only for when we are eating and someone asks over the dinner table).
We skin birds and stuff them with cotton and sew them up and dry them out and tag them and freeze them (to kill off any annoying little buggies) and then put them away in the rows and rows of specimens the museum holds for anyone who might think of some clever study which demands access to the library of information stored in the skins. Was that a run-on sentence? possibly.
At any rate, the rest of my blog entry follows in the form of pictures and my commentary for them. please enjoy! (Note, if you’ve followed me on facebook, then this will be entirely boring and old news. yes, I recycle old material. But I have a new audience now!)
also, I feel this goes without saying, but if you have questions, go ahead and e-mail them to me at ccraighead@pugetsound.edu
-
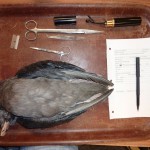
My basic set up: Reading glasses, razor blades, various poking and prodding objects, a pen and the data sheet, where i write down silly things like molt, fat and the sex and size of gonads!
-
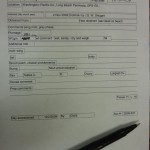
Data sheet! See for yourself all of the blanks that I get to fill in! (if need be…some of those blanks just…stay blank. yeah…
-
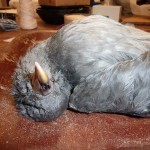
Don’t I just have the cutest darned face?! A before shot, so that my audience might be able to compare the corpse filled skin with my cotton filled skin!
-
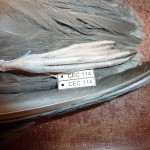
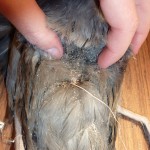
Nooooo! my whole big lovely description of what this is a picture of just got deleted! ugh! silly. well, anywas. This is my prep-tag number, and I attatch one to every bird i skin, unique to each bird. ha haha a, for us work-study students, it is just a measure of the number of birds we have skinned.(i know this is an old picture, because I am now onto CEC 313 or something…yeah, over 300 birds i have prepared…good lord…) This tag will remain with this bird as it’s identifying name…forever. ha hahahahaha. it will get another tag sometime after it dries, but i don’t have pictures of that, so you don’t get to hear about it.
-
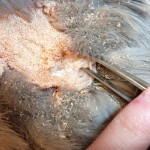
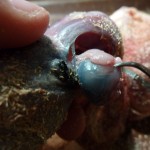
Ok, so here, I have taken the razor blade and sliced down through the skin along the sternum, across the belly, and to the cloaca (where my tweezers are). I am looking here for the bursa, which, depending on the structure, helps determine the relative age of the bird. All of those little tiny grains of stuff? that is sawdust used to soak up blood and ooze and slime, and gives my fingers some purchase on the skin.
-
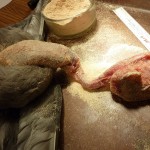
Ok, this is the skin of the bird pulled all the way off of the body of the bird. I have cut through the thighs, wings, and tail bones of the bird so that those structures remained atached to the skins, not the body. I have now pulled the skin all the way over most of the skull to the very nearly the beak of the bird. Next step, removing the skull from the body!
-
So, in removing the skull, first you have to pull the eyes out. Then you cut through the chin and around the jaw, making a triangle cut around the neck. Now you can sepparate the skull and the body, and clean out the brains! ooooo00000oooo!
-
Ok, so i kind of skipped a lot of steps in my photography. well, i get distracted. So, before I sew up the bird skin (as shown) I have to turn the skin right-side out again, shove cotton in the eye-holes, wrap a stick with cotton for a head and body structure, pull a large blob of cotton up through the neck for a body, wrap cotton around the legs to mimick thighs, and also take one wing off to dry on it’s own, and leave one wing on, but tie it to a stick so that it stays properly on the side of the bird. Yeah. skipped a lot of steps in my photography…and then is sew the whole mess up along the cut i made in the first place!
-
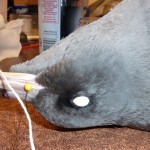
A picture of the now stuffed head with cotton eyes.
-
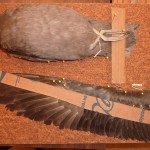
Finally, I pin out the bird on a board so that it dries in the desired position. I also stretch one of the wings and pit it out so that anyone can have a look at the wing.
-
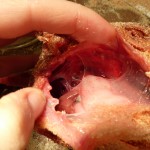
Here, I am cutting into the bird’s body to check the gonads. We have to know if the bird is male or female, and if they were breading age, etc. So, we take a ruler to them!
-
My basic set up: Reading glasses, razor blades, various poking and prodding objects, a pen and the data sheet, where i write down silly things like molt, fat and the sex and size of gonads!
-
Data sheet! See for yourself all of the blanks that I get to fill in! (if need be…some of those blanks just…stay blank. yeah…
-
Don’t I just have the cutest darned face?! A before shot, so that my audience might be able to compare the corpse filled skin with my cotton filled skin!
-
Nooooo! my whole big lovely description of what this is a picture of just got deleted! ugh! silly. well, anywas. This is my prep-tag number, and I attatch one to every bird i skin, unique to each bird. ha haha a, for us work-study students, it is just a measure of the number of birds we have skinned.(i know this is an old picture, because I am now onto CEC 313 or something…yeah, over 300 birds i have prepared…good lord…) This tag will remain with this bird as it’s identifying name…forever. ha hahahahaha. it will get another tag sometime after it dries, but i don’t have pictures of that, so you don’t get to hear about it.
-
Ok, so here, I have taken the razor blade and sliced down through the skin along the sternum, across the belly, and to the cloaca (where my tweezers are). I am looking here for the bursa, which, depending on the structure, helps determine the relative age of the bird. All of those little tiny grains of stuff? that is sawdust used to soak up blood and ooze and slime, and gives my fingers some purchase on the skin.
-
Ok, this is the skin of the bird pulled all the way off of the body of the bird. I have cut through the thighs, wings, and tail bones of the bird so that those structures remained atached to the skins, not the body. I have now pulled the skin all the way over most of the skull to the very nearly the beak of the bird. Next step, removing the skull from the body!
-
So, in removing the skull, first you have to pull the eyes out. Then you cut through the chin and around the jaw, making a triangle cut around the neck. Now you can sepparate the skull and the body, and clean out the brains! ooooo00000oooo!
-
Ok, so i kind of skipped a lot of steps in my photography. well, i get distracted. So, before I sew up the bird skin (as shown) I have to turn the skin right-side out again, shove cotton in the eye-holes, wrap a stick with cotton for a head and body structure, pull a large blob of cotton up through the neck for a body, wrap cotton around the legs to mimick thighs, and also take one wing off to dry on it’s own, and leave one wing on, but tie it to a stick so that it stays properly on the side of the bird. Yeah. skipped a lot of steps in my photography…and then is sew the whole mess up along the cut i made in the first place!
-
A picture of the now stuffed head with cotton eyes.
-
Finally, I pin out the bird on a board so that it dries in the desired position. I also stretch one of the wings and pit it out so that anyone can have a look at the wing.
-
Here, I am cutting into the bird’s body to check the gonads. We have to know if the bird is male or female, and if they were breading age, etc. So, we take a ruler to them!

